Some people are all about the pristine preservation of our historical accomplishments. We’ve all seen the 1950s Corvette restored to show room perfect. What I am going to show you is absolutely nothing like that.
I’m more along the lines of, stop don’t crush that, there is art to be made. In fact, at the Burning Man Festival, they actually encourage this type of vehicular debauchery.
So, why would I do such a thing to a perfectly good suburban. We all ponder questions such as why do pigs fly, and did that stripper really like me? Some questions have no answers.
This all started one day when I’m wife found a picture on the Internet. She called me over and said, “Honey, do you think we can make this?” “Sure, I said.” Before thinking through the ridiculous project I was agreeing to. After all, how hard could it be? Obviously, someone was able to draw the vehicle. Drawings always translate perfectly into real-life.
Now to figure out which vehicle was the right shape. Possibly a Vespa? No, think bigger. Obviously, I would have to expand substantially beyond the body of the vehicle and figure out how to hide the body as well. So I thought, a suburban would be just perfect because it is small enough that when I double its size it should still be easy to manage. Unfortunately, by time my rational mind had kicked in, I had already purchase a Suburban and I was committed to seeing it through.
Perfect, this thing is 12 feet wide, 30 feet long, and almost 20 feet tall. 400 pounds of propane neatly fits in the front to power the flame effects. The top gun will shoot a 30 foot explosive fireball. The rear exhaust stacks will shoot fire jets, and the front fire towers will be perfect to chain people to. Somehow, this all made sense to me.
In my initial sketch I can’t believe I forgot the rear grappling claw. This is highly important if you want to have any chance of suspending aerial fire performers.
As I slowly came down from Mad Max fantasy world, I realized I had to find a way to make this actually work. Making the tracks a stationary prop was just not an option. Luckily, the suburban was four-wheel-drive. Because this vehicle only had to run, at most 10 mph, I would drive the vehicle with the rear axle, and use the front axle to drive the tracks.
It turns out that I only needs a 32 inch lift... And I thought this was going to be hard.
Yes, I figured out pretty quickly that I would have to actually use the axles to support the vehicle.
So fast-forward a little bit. I must’ve forgotten to take a few photos but I think you get the general concept. The rear end needed to move down 32 inches and back about 2 feet. I determine the easiest way was to just drop the suspension and build a frame to support in its new position. The drive shaft would end up at a pretty steep angle, but it wasn’t going to bind and were only going 10 mph. What could possibly go wrong?
Look mom, no mounting brackets. This should be pretty easy. I just need to make the bottom thingy be reattached to the top thingy but in a different place then where the thingy was before.
A little plasma cutting and an air hammer and those rivets fell right out. Now for some magic.
...Yes, I know it's not really magic, but let my have my moment.
A "slight" adjustment was needed on the original leaf spring mounting blocks. Yes, I’m aware it’s a very steep angle, but just bear with me. This is going to be cool and that’ll totally make up for it.
Oh yes, where were we? Time to remove the drive shaft and reposition this where it belongs.
A lift kit by any other name is well, let’s just say it a fixed my problem. It’s amazing what you can do with a little 3 inch box tubing.
Back in place, and you can barely tell it’s not factory. Now where did that driveshaft go?
Just a little finish welding and we have a winner. It turns out that I also made a great home for the generator.
So back to this turning thing. It’s way too short. While, I considered using my Acme tubing stretcher, I decide to take a fancier approach.
Ah, much better. Turns out the shaft was just made from 3 inch tubing. In this modern world we live in, I can even have it delivered.
Now to attach the round thing to the other round thing. I considered using some hot glue, but I ultimately decided to be professional and use some of that melty metal stuff instead. It worked like a charm.
Moving to the front end I was greeted with some additional challenges. It turns out that unlike the rear end, this axle has to do some additional wizardry if I wanted to do more than go in a straight line. After great contemplation, I decided that dropping the suspension 32 inches was going to create a situation that cannot easily be solved by what I learned in my high school geometry class.
Perfect, that came off easy enough. On top of that, it’s right where it needs to be, however 32 inches lower and a few popsicle sticks away from being ready to go.
I know what you’re thinking, this is the coolest thing I’ve ever seen…
Oh, you are actually wondering how that steering arm thingy is going to attach to the axle that is now lying on the ground. Fear not mere mortals, where there is a will, and someone crazy enough to try.
First, however we need to attach the axle back to the Springs. In case you’re wondering, I was joking about the popsicle sticks. I don’t have that kind of budget. So back to the 3 inch box tubing with a little weld here in a little well there. We now have something that will make off roaders shudder in fear.
Look at those mighty springs holding up the castle.
Come on, you don’t actually think I wasn’t going to put a torsion bar on there. Wait, don’t answer that. Just take a deep breath and bear with me. I’m going somewhere with this.
First, before I forget, there’s a slight matter of brake line extensions. Now, before you all get up in my shit and remind me that brakes just slow you down, my wife insisted, and sometimes you just have to remember, happy wife happy life.
Okay, uncover your eyes. It's not quite as scary as it looks. Well, actually it is, but it’s only weird tilt it works. There was a little trial and error, but after I added a hydraulic boost cylinder, we were good to go. On the bottom I had to create a little modern art sculpture to tie the shaft onto the steering knuckle because I did not trust welding directly onto the knuckle. You ever weld your knuckles? It’s not fun.
I knew I held onto those extra sockets for a reason.
There was a lot of finish welding, a little bit of crying, a fair amount of kicking, but the screening was kept to a minimum. Just give me the benefit of the doubt that all the little stuff I didn’t show somehow magically got finished.
As much as the interior of a 1988 suburban is the epitome of design perfection, it did not quite live up to the diesel punk aesthetics that I was going for.
When all else fails, cover it in spray on bedliner.
The dash is coming along nicely. The fire missiles buttons are fully installed. They're just for show.
… Or are they?
Where the back seats previously resided, that place that normal people put the kids, we now have an access point to get to the roof gunner position. Not quite as lounge worthy as before, but the foam rubber floor does add some squishy luxury.
With those pesky wheel wells removed the future is wide-open. Sheet aluminum is nicely filling in for that 1950s futuristic feel.
Look mom, no roof. It’s like T tops for rednecks, but without the tops, but with the rednecks. Wait, I guess all T tops are for rednecks. Where was I going with this?
Filling in the roof with some of that fancy metal forming stuff. I think I saw this on TV once. It was that show with all the yelling.
Ah, roof there it is.
When this thing catches on fire, I will totally regret cutting apart this fire extinguisher.
We all live in the shiny… Sorry, that was just bad.
Those pesky corners that just have to be unique. No one ever said I want to be the problem child when I grow up. But corners will be corners.
Well damn, almost looks like I have a plan here.
Like it's supposed to go there. And I thought I would have to fix it in post.
Shiny and chrome, here we come.
Wide-open and ready to party. Everything that glitters isn’t gold, especially the rusty trim I riveted in to finish out the design.
A little old-school wire loom and the theme is coming along nicely.
Come on, I have been doing all the work so far. Your turn to say something.
We’re getting somewhere, but there is a long way to go. The whole interior needs lights, cushions, stripper pole, alcohol, and lots of people without enough common sense to stay away.
I contacted General Motors about making this a factory option. I’m sure I’ll hear back any day now.
Advanced navigation system installed.
I’m not a complete barbarian. It kept the gauges.
Yes, it does have nuclear strike capabilities.
As much as the whole lounge feel is appealing, I did decide to add seats to aid in the task of driving. However, I still don’t have a fix for the questionable linkage between the seat and gas pedal.
The seats were salvaged out of an old 6 x 6 amphibious vehicle. They were in rough shape and had to be completely rebuilt.
Upholstery 101. Duct tape is your friend.
I added a piece of wood. For some reason this was important.
It’s pattern time. Now taking appointments for prom dress fittings.
I sew, therefore I am.
Zen and the art of staple gun.
Ever try to shove a golf ball through a garden hose? That is kind of what it was like trying to stretch the vinyl over the seat back. This is where the heat gun technician skills really kicked in.
That whole back cushion thing we talked about. All flame throwing vehicles have to have a softer sensitive side.
After a ritual tree sacrifice, we have the perfect foundation for the rear cushions.
I just happen to have the extra foam from a previous project. I love being able to spin a positive light on over purchasing.
It’s kind of like furniture for dummies.
Back to that whole stapling thing we talked about before.
Mike and Steve, I’m really sorry we couldn’t work out our differences, but you will always be a special part of this project.
So if you’re still following along from before, the rear axle had to move back a couple feet. So here I’m extending the frame to enlarge the body. Yes, I’m jumping around a bit, so if you’re missing the professional suspension fabrication just scroll back up for your fix. If you have ADD, everything looks amazing.
So I found these weird eight-foot wide bumper things at an auction. Free pony to anyone who can figure out where they came from.
Another one of these bumper things for the front end. All tied to a roof platform for the second story build.
Back there too.
Side platforms and rails in place. Strategically designed to keep infantry… I mean drunk people from falling off.
Math is hard.
Did you know that if you buy rivets in 20 pound boxes they’re cheaper?
Operation, hide the Suburban, coming along nicely.
While I welded the rear door shut, I made the front doors still operational so we didn’t have to go all Dukes of Hazard.
Old motorcross tires provided the trim for much of the vehicle. The word of the day is “free.”
After some failed begging, borrowing and stealing, I found some cheap motorcycle fairings on craigslist. These will add some shape to all the flat sheet metal surfaces.
After sanding them down, a nice coat of urethane bedliner made it, oh so pretty.
So before you tell me how I ruined a ton of perfectly good motorcycle parts, there is a plan here… Maybe?
Someone threw out some perfectly good Harley exhaust pipes. Perfect for making some artillery shell props. Just add 1 pound of black powder… I mean, cap off the ends, you get the idea.
This episode was brought to you today by the shape “circle" and the number 3.14.
The entire concept of building tracks, seemed a bit daunting, so building 12 sets really put me at ease.
All good stories start with, "that one time I was cutting up a bunch metal…"
I cut it twice and it’s still too short.
Here is a frame of some type. I think it’s supposed to hold wheels.
Oh, there we go. This should help.
Mommy, where do babies come from?
These look just like the print, that can’t be right.
I think I’m onto something here.
Okay, almost done. Now I just need to figure out how to make this float in place. It needs to freely move up and down and has it pivot when it encounters terrain. After giving up on the idea of having a bunch of people hold it there and call it performance art, it looks like somehow it will have to be mounted to the axle.
While I mentioned at the beginning that the front drive shaft was going to power the tracks, this was not actually the original concept. The idea was that the bottom tracks were going to ride on the ground and then power the rest of the tracks. This became extremely complicated when I had to deal with things such as steering and suspension geometry. We’ll get more to this later, but let’s first figure out that axle thing.
On a bright note, I found something I can think about to cry myself to sleep at night.
Steel, the other heavy metal. I just need to space these out past the wheel hubs and mount the tracks on some flange bearings. It will practically build itself.
Just what the doctor ordered.
Without my welder I am nothing...
I should probably see someone about that.
Add a few custom-made lug nut spacers and were good to go.
Now to the way back machine and see how this was actually built.
Flange bearing mounting plate.
It turns out if you tap those holes, the bolts screw in easier.
So now to attach it to the tracks. You didn't thing we’re going to get off that easy?
Some machined and rounded over float bars to allow the track height to vary with the terrain.
Steel float, pin, slot, slide thingy.
My good side.
Here’s where shit got real. First problem, the bottom of the slide pivots. This allows the track frame to hit the wheel. Second, the entire track mechanism is a lot of weight to put on that axle and when I try to load it on the trailer it’ll pivot and hit the body of the truck.
Seems a little sloppy to me. Would you let your wheels go out dressed like that?
Oh, perfectly fixed. Let me know if you have any idea what this means.
Squirrel!
Let’s take a break from the previous headache, and figure out how to build the rest of these tracks.
Kids, don’t try this at home. Go to your friends house with the better tools, and less supervision.
Sprockets and bearings, oh my. You get a discount, when you call the supplier and tell me need like 100 of these.
So the tracks are made out of surplus conveyor belt. It’s lightweight and best of all, I already had it. The bandsaw made quick work of this one.
Now to drill 1.3 million holes to attach the treads.
Alligator lacing grips to attach the two ends of the belt together. These would probably make a great torture device too.
Hammered in place and ready to rock ‘n roll
When you can’t finesse it in place, don’t force it, use a bigger hammer.
What requires two sheets of marine grade plywood and a lot of patience?
Time to make the tank treads.
The blocks for the inside of the tracks to guide them on the wheels.
T Rex bedliner. I always know I’m in good hands when the label on the bottle has a picture of vicious predator chomping down on the helpless.
Bedliner is the new black.
Drill holes, insert bolts, rinse and repeat, never stop.
You can’t have a good story without a tragedy.
So after sorting out this whole fiasco, the bottom track frame pivot was welded rigid, and the angled tracks were separated from the lower tracks. The lower tracks ride on the ground which causes them to roll. The upper tracks will be tied into a drive shaft mechanism and run off a sprocket tied to the front axle mount on the transfer case. Let’s just say it’s a work in progress. In the final rendition, the tires will be completely hidden from view.
The Harbor freight special tires are just not quite doing it for me. Here’s a little Photoshop for your viewing pleasure to see how we can fix this.
Time to fire up the plasma table I built and cut out the aluminum shiny parts.
I swear, the computer made me do it. These things are going to take over the world, but I’m ready.
Where’s my tinfoil hat?
Now for the top steel part. This half is less shiny and chrome.
For a little rust, just add some vinegar and salt water.
For full transparency, I’m not sponsored by Kroger. However, Kroger if you’re listening, I am willing to sell my soul.
Oh, the tragedy of it all. Actually, the rust is kind of pretty.
So this vehicle requires a ton of fake shocks for all the tracks. So how do I make all these things with no budget? It turns out that surplus oil filters for vehicles that no longer exist are pretty cheap.
If you’ve never cut apart like 50 oil filters on a lathe, have you even lived?
Painted up like it’s prom night.
Don’t tell them they’re not real, or feed them after midnight.
So I had to submit a lighting plan. I probably should’ve given myself more than two days to build all this.
Let’s give it the old college try.
Turns out some old hubcaps make perfect housings for the lights.
And people want to give me a hard time about being a hoarder.
Some waterproof RGB outdoor sign lighting modules were perfect for the project.
A little black paint, and a screwed on mounting plate, we have a winner.
You know all those speaker grills that you never ended up using? Turns out, with a little spray paint, they are quite interesting looking. They make perfect covers for the lights along with some translucent acrylic I cut out on my CNC router.
Okay, enough with the hoarder thing, I have feelings.
Adding some expanded metal rings around the lights adds the, I just stole this from a junkyard feel.
All trimmed out and ready for a night on the town.
The interior is a whole other lighting project in an of itself. I’m using the same concept here, but mounted onto a flat plate to save space.
A clear dome is glued on top of lights.
Back to those speaker grills again.
Just add12 V and we get our dignity back.
So this is the part, where I had to look like I knew what I was doing. It’s like, fake it till you make it on steroids.
At least it seems reasonable on paper.
So I have a confession to make. I only had time to finish the one main cannon. Additionally, I haven’t even started the 10 step pyro program.
The main barrel is a 12 foot long, four-inch diameter piece of aluminum tubing, and I identify as sane.
The canon is powered by a 2 inch Asco propane valve rated for 25 psi. Go big or go home.
The propane tank screws directly to a cast-iron flange that exits into a 2” steel pipe.
The welded aluminum assembly with the flange attached.
Expansion tank, valve and cannon barrel in place for the test fit.
Pilot light and plumbing in place.
This part of the project was getting completed as I was packing to leave for Burning Man. This was not exactly the most precise fabrication I’ve ever done. Actually, it was more of an oh shit what am I doing triage type of thing. Anyhow, you can see the rudimentary cannon base with some test fit motorcycle fairings...
Oh well, we’ll figure it out when we get there.
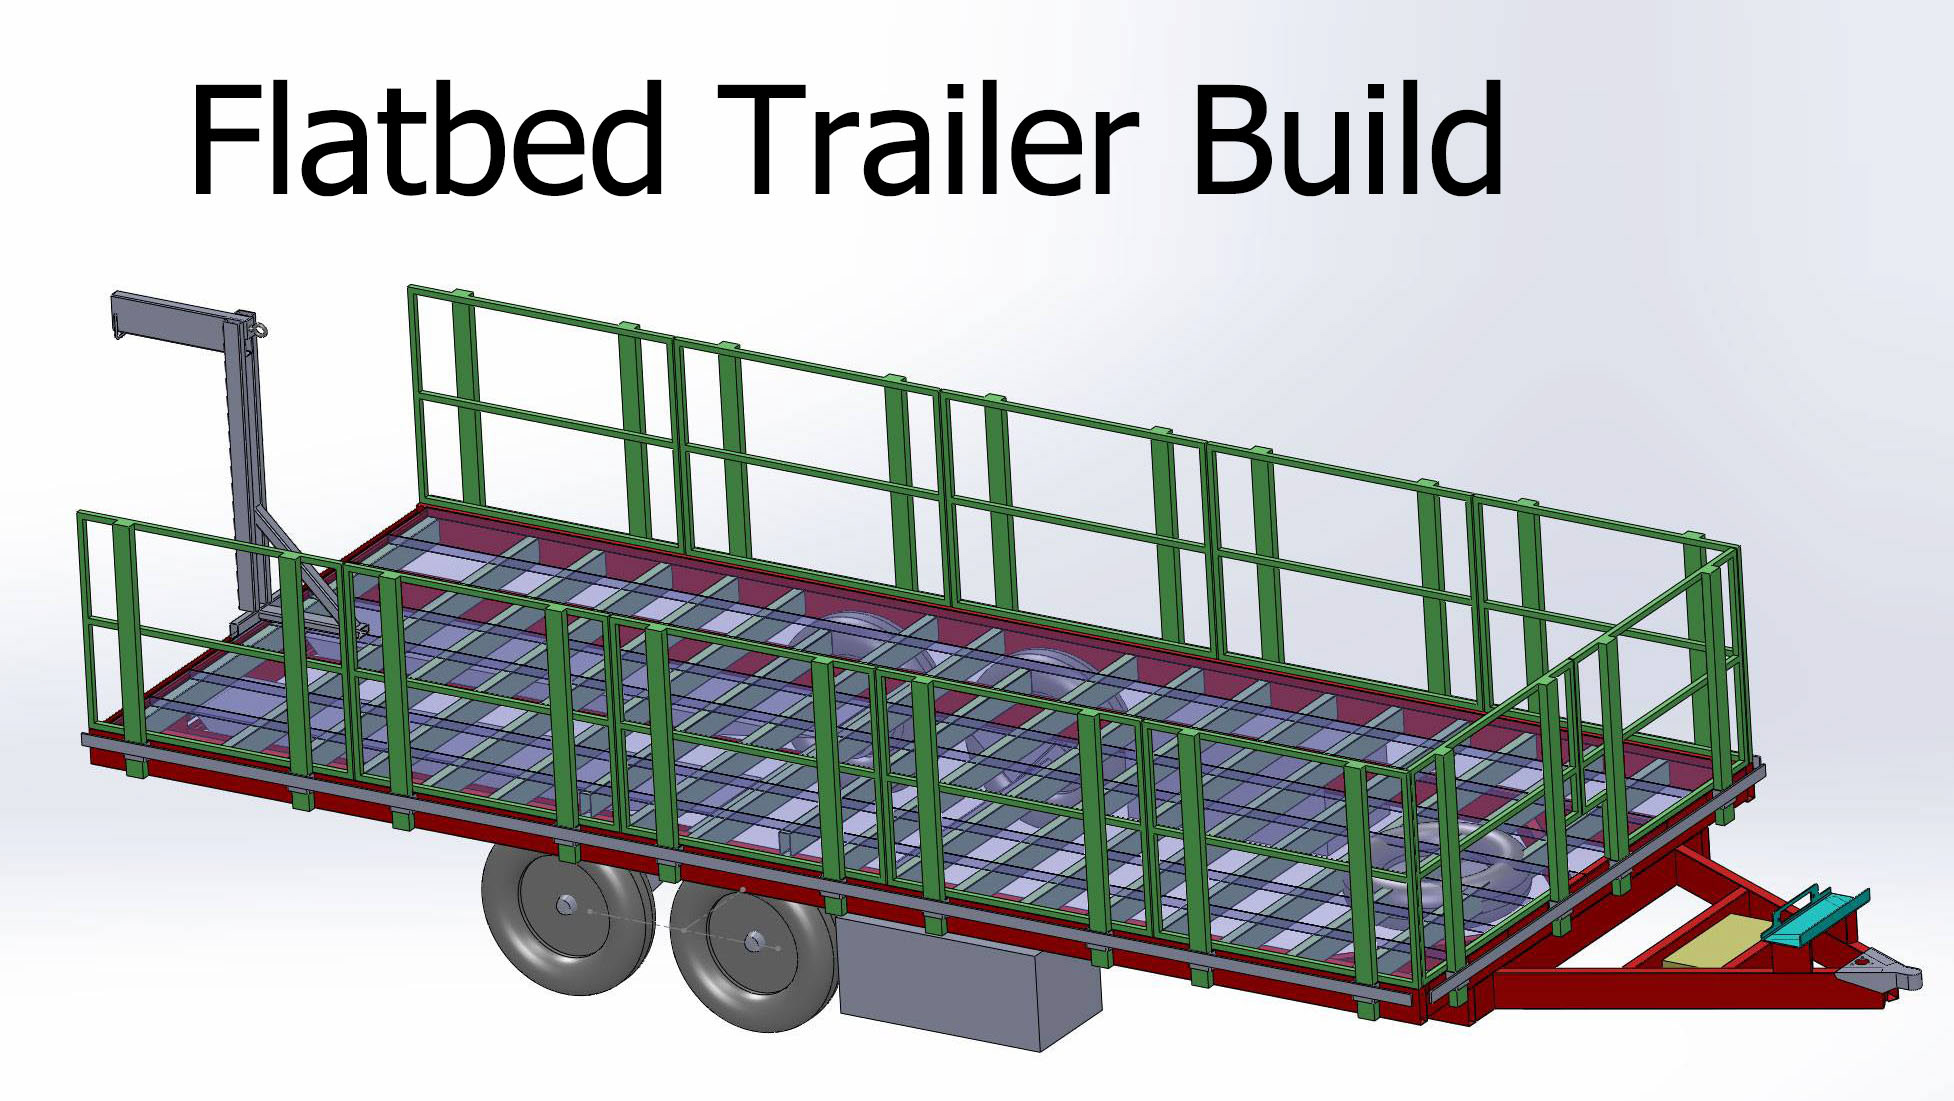
Loaded up, and ready to go. I actually had to build the trailer just to fit this vehicle. My old trailer was too small. Talk about making a mountain out of a mole hill.
No, I’m not dragging ass. I’m trying to pop a wheelie.
At the gate, trying to get into Burning Man. They have to make sure we are not smuggling hippies.
In line at the Department of Mutant Vehicles. They have to make sure I mutant it enough to get approved.
Spoiler alert, we passed.
Were dorks.
So far, so good. I also made some Pyro for the trailer that doubles as a stage. The views aren't bad.
Where do we go from here. I’m not going to pretend that this project is all that plus a bag of chips. Maybe a half-filled bag of Cheetos while we try to stand there looking cool with orange hands.
This project is only about half done, but I do plan to finish it one day. So far, it has been a huge undertaking and it’s going to take a lot of time to see it to completion. On a bright note, this misguided adventure, is To Be Continued…

